Pajamas. Jammies. PJ's. Who doesn't like to be comfy and cosy for bed?
I've sewn plenty of pj's for Phin, but none for me aside from a robe, which I have worn non-stop since it was completed. I've spent many, many hours in pajamas during the first year or two of Taco's life - so many hours that by the end of this summer all of my pajamas were simultaneously showing signs of wear and tear. It was high time for some me-made jammies for myself.


For this first version of the bottoms, I didn't worry about making button holes and adding a drawstring. I just made a simple elastic waist. The fit and comfort was spot on.

Since my first set of pj's came out so well, I immediately made a second pair. This time I used a black and white striped rayon jersey that I picked up when Craftsy had a big fabric sale. The fabric is luxuriously soft.

Still smitten for the picot elastic, I decided to finish the striped tip with it too. It's a great finish for a knit top since it is decorative, functional and easy to sew. Simply pin your picot trim to the neckline with the right sides facing. The elastic should be in the seam allowance and the picot part should be on the other side of the seam line. Sew along the seam line.

Trim back the seam allowance of the fabric. Then turn the elastic to the inside and press. Finally, add a row of top stitching, making sure to catch the elastic. I used orange thread for fun because that's how I roll.


I added a few little details to this version like looped straps...

And I finished the waist with button holes and a drawstring.

I've been wearing these two pj sets non-stop since finishing them. And I am so pleased with how comfy they are that I think it would be safe to say that it will be some time before I buy RTW pajamas again, if ever.

Also, this was the perfect project for the end of summer when I wasn't really ready to start sewing autumn projects, but also didn't want to keep on sewing summer clothes. I generally have a few weeks of not knowing what to sew when the seasons change; my mojo deserts me. But my happiness with this project makes me think I've hit on something. The next time I feel my mojo slipping into a between seasons rut, I will sew more pjs and the other projects - like bras and panties - that I never prioritize because I'm too busy trying to sew for the current season.

I really do learn new things about myself all the time as a sewist. That is half the fun. For today, though, the lesson is custom pj's are the best.
I've sewn plenty of pj's for Phin, but none for me aside from a robe, which I have worn non-stop since it was completed. I've spent many, many hours in pajamas during the first year or two of Taco's life - so many hours that by the end of this summer all of my pajamas were simultaneously showing signs of wear and tear. It was high time for some me-made jammies for myself.

I had bought several pairs of the same DKNY knit modal pajama bottoms post-partum because I found them so comfy in every way. They are hands down my favorites. So, I dismantled one of the more worn bottoms and carefully traced off a pattern, transferring all the important info to a paper pattern and then truing up the front and back.
For the top, I used my trusty rusty True Bias Ogden Cami with a few modifications. I sized down since I was sewing this woven pattern in a knit fabric. I also eliminated the facings and instead used picot trim elastic to finish the neckline.
 |
| Test version |
I sewed my first, test version of the pjs in a black modal jersey from my stash. I didn't have quite enough fabric for the top, so I had to economize by shortening the cami by about two to three inches and adding a center seam on the back. I am giddy about how the neckline came out with the picot trim elastic.


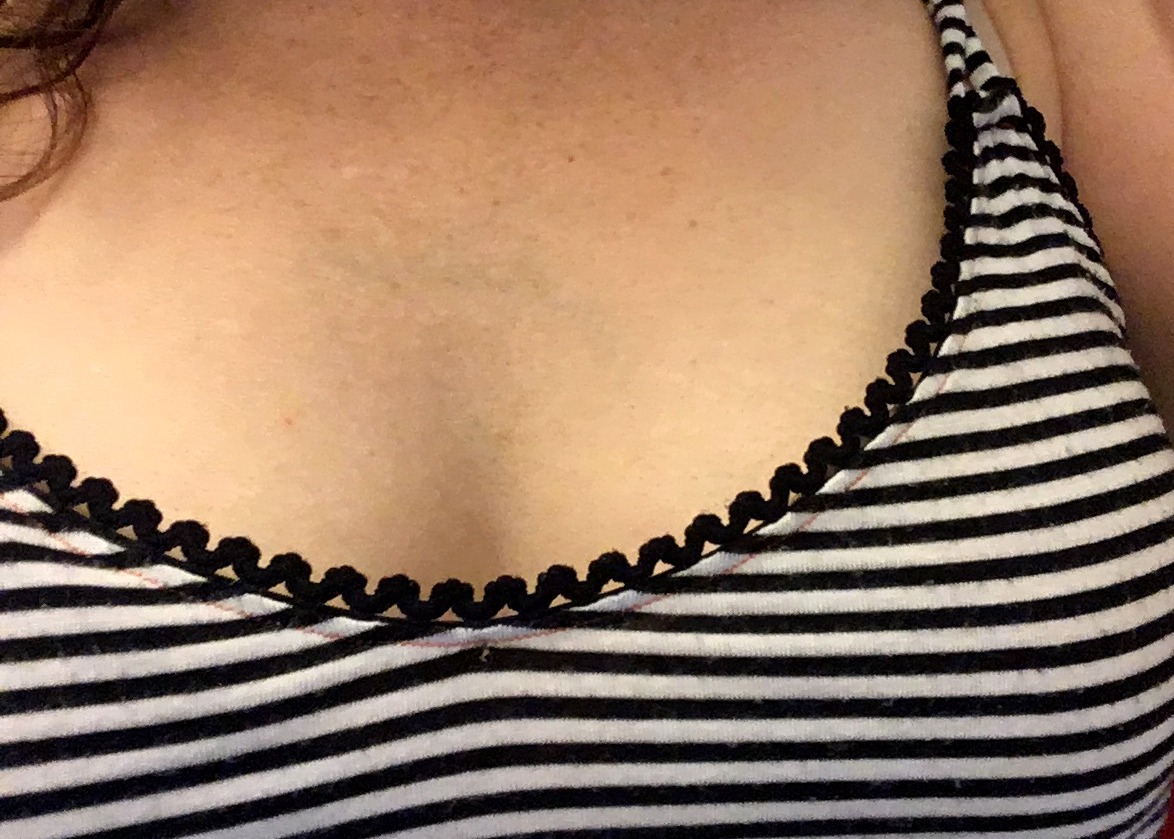
Since my first set of pj's came out so well, I immediately made a second pair. This time I used a black and white striped rayon jersey that I picked up when Craftsy had a big fabric sale. The fabric is luxuriously soft.

Still smitten for the picot elastic, I decided to finish the striped tip with it too. It's a great finish for a knit top since it is decorative, functional and easy to sew. Simply pin your picot trim to the neckline with the right sides facing. The elastic should be in the seam allowance and the picot part should be on the other side of the seam line. Sew along the seam line.

Trim back the seam allowance of the fabric. Then turn the elastic to the inside and press. Finally, add a row of top stitching, making sure to catch the elastic. I used orange thread for fun because that's how I roll.

Voila! Neckline done.
I added a few little details to this version like looped straps...

And I finished the waist with button holes and a drawstring.

I've been wearing these two pj sets non-stop since finishing them. And I am so pleased with how comfy they are that I think it would be safe to say that it will be some time before I buy RTW pajamas again, if ever.

Also, this was the perfect project for the end of summer when I wasn't really ready to start sewing autumn projects, but also didn't want to keep on sewing summer clothes. I generally have a few weeks of not knowing what to sew when the seasons change; my mojo deserts me. But my happiness with this project makes me think I've hit on something. The next time I feel my mojo slipping into a between seasons rut, I will sew more pjs and the other projects - like bras and panties - that I never prioritize because I'm too busy trying to sew for the current season.

I really do learn new things about myself all the time as a sewist. That is half the fun. For today, though, the lesson is custom pj's are the best.
No comments:
Post a Comment